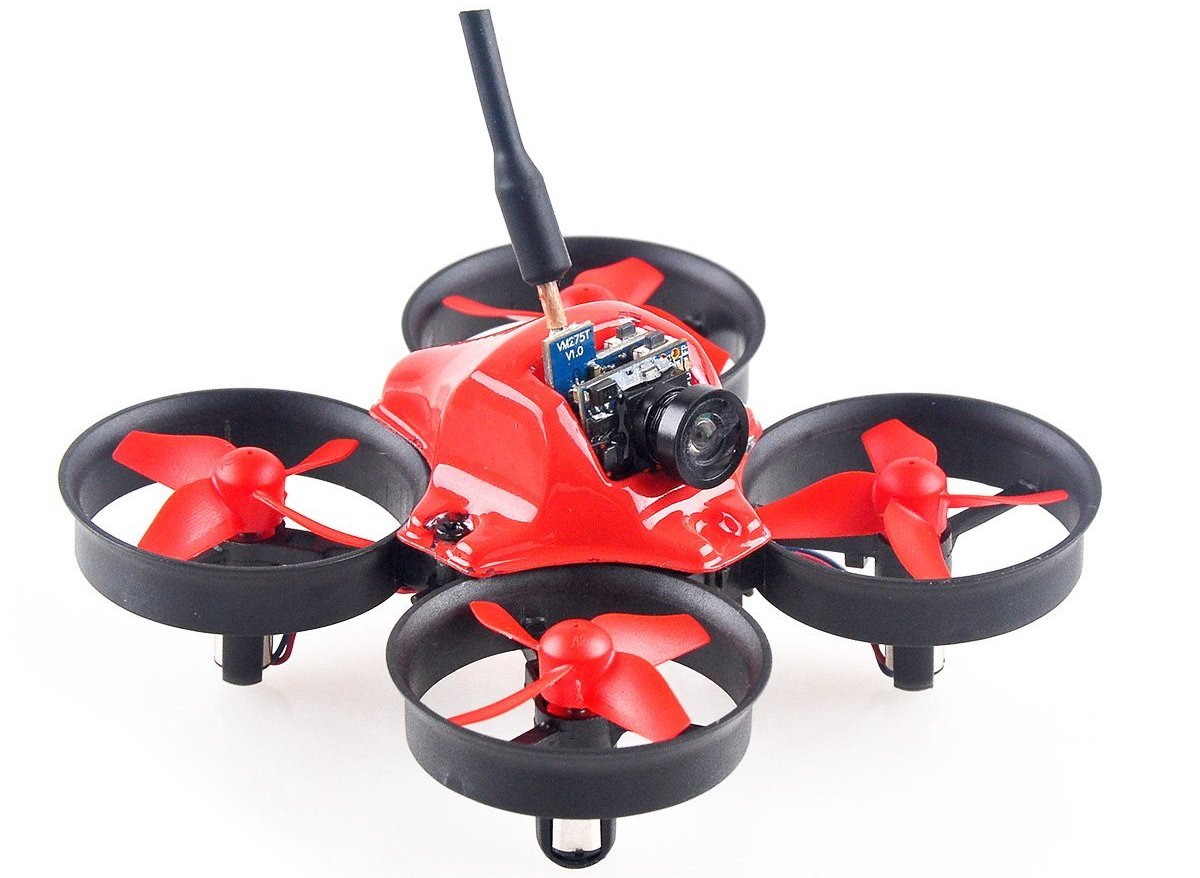
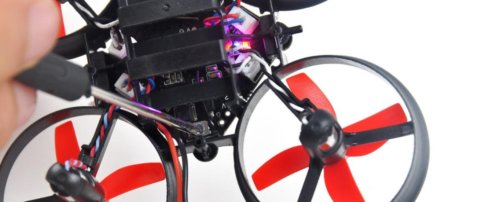
Makerfire BNF Micro FPV Racing Quad
F3 EVO Flight Controller with Native Spektrum DSM Receiver
Features
- 64mm motor spacing, four carefully-tuned electric ducted fans
- F3 EVO Brushed flight controller fully programmable through Betaflight(Cleanflight option)
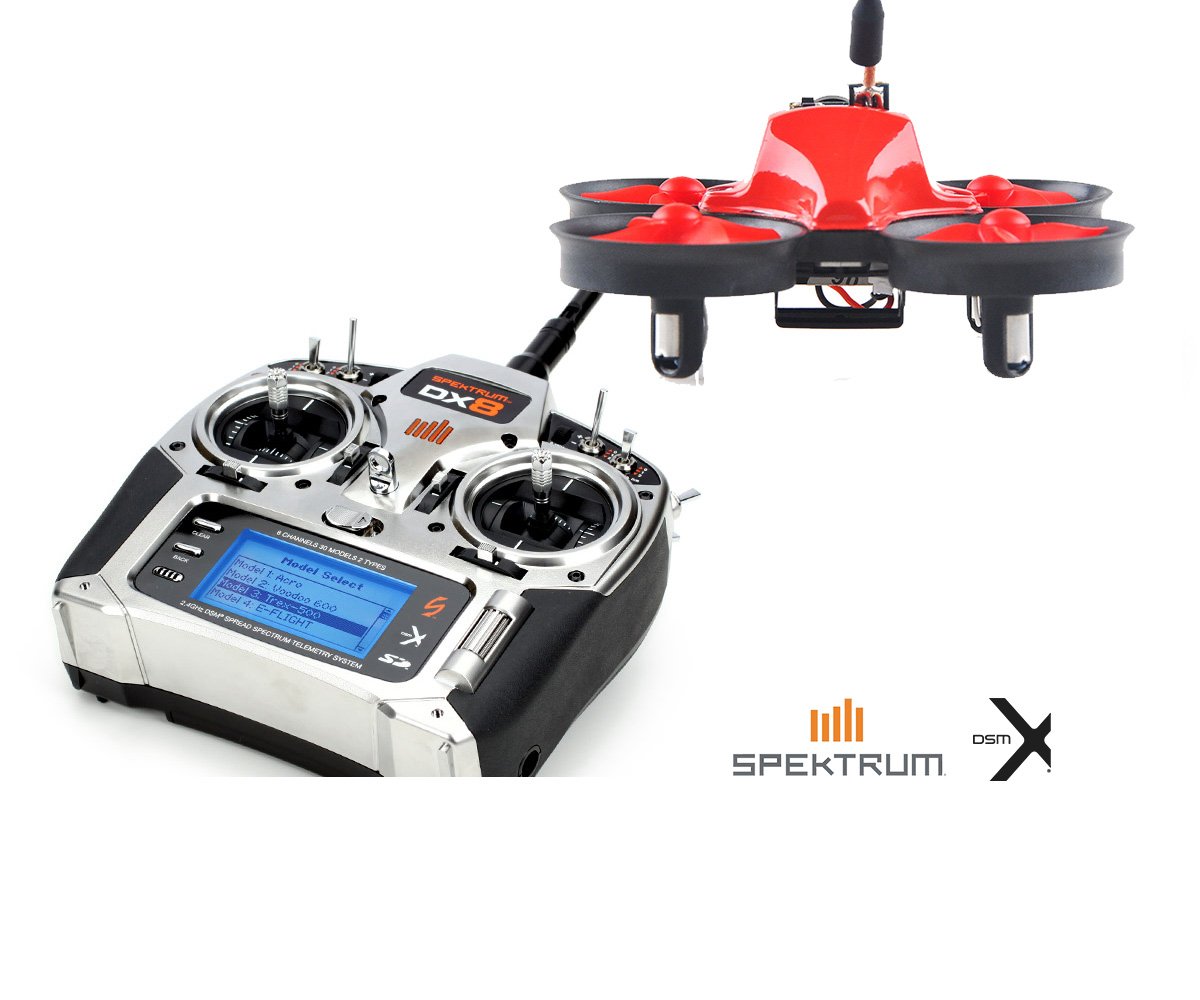
- Built in native Spektrum DSM receiver,compatible with ALL Spektrum transmitter,like DX6/DX8/DX9/DX18 etc
- 5.8G AIO 25mW camera, with 10° tilt camera mount
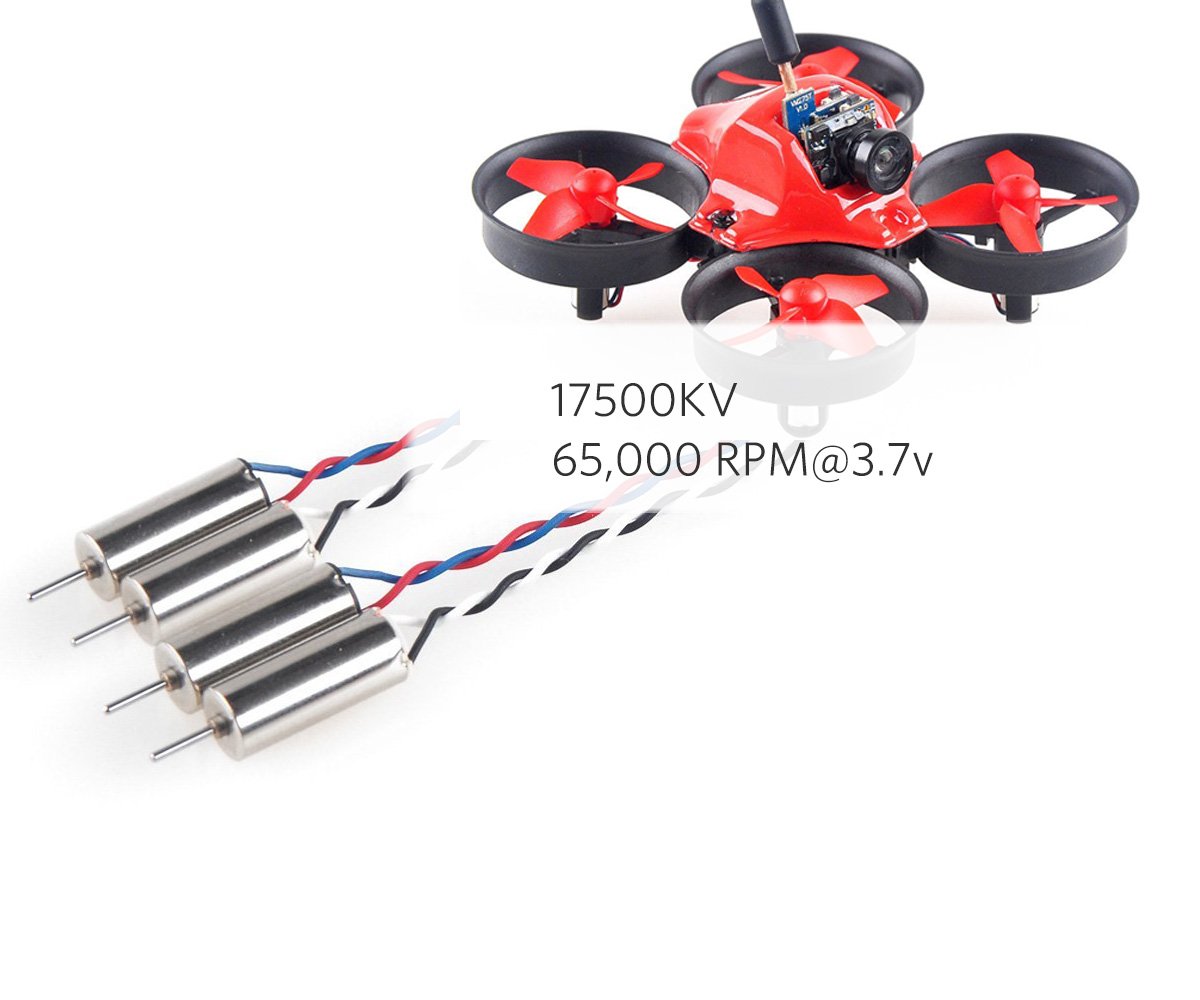
- Special sauce edition motors, 17500KV, 65000 RPM@3.7v,up to 1.34A load current at 4.2V (direct drive)
- 35C 200mAh 1S battery, 3 min 40 seconds flight time
Specifications
- Wheelbase: 64mm
- Weight: 22g (without battery)
- Flight Controller: F3 EVO Brushed FC with Native DSM receiver
- Motor: 17500KV 6x15mm Coreless Brush Motor
- Receiver: Spektrum DSM compatible native receiver
- Camera and 5.8G Tx: AIO 520TVL 1/4 Inch Camera 25mW 40CH
- Batterry: 3.7V 200mAh Lipo battery with Pico JST connector
- Flight time: 3 min 40 seconds
The current board ONLY surport DSM2 protocol with 8 channel or above,like Spectrum DX8/DX9/DX18 etc.The next version we will update the RX module to support all the Spectrum radio transmitter,like DX6/DX6i.
The Newest version is compatible with ALL Spektrum radios(e.g. DX6,DX6i,DX7,DX8) or Spektrum compatible transmitter module(e.g. Turnigy 9X with OrangeRx module).Go to the F3 bushed FC page to check whether your radio is in the supported list.
This is a Spektrum DSMX/DSM2 compatible receiver. It is not an official Spektrum receiver. The Spektrum, DSMX and DSM2 brand is a trademark of Horizon Hobbies, USA.
Native Spektrum DSM Receiver:Compatible with ALL Spektrum radios or Spektrum compatible transmitter module.No more hacks, just bind and fly!
F3 EVO flight controller:Fully programmable through Betalfight using the onboard USB port! Tune all the parameters, PID's, and rates to your perfect settings!

17500kv these motors:Considerably more powerful than almost all of the motors used for Tiny Whoop style aircraft,without encountering considerable oscilations.
10° tilt camera mount:Perfect angle for Tiny Whoop flight. At this angle the pilot can still see everything ahead in full-blown fast forward flight.

You could Buy on Amazon or get even faster from local suppliers.
For more detail information,please Download User Manual
About how to upgrade firmware,please click Flash Firmware for detail manual.
Binding & Flying Procedure
To bind the Makerfire Micro FPV Drone to a Spektrum radio:
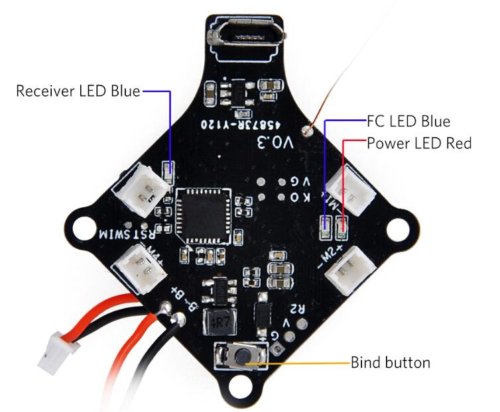
a.Click the bind-button meanwhile powering on the drone, either by connecting the battery or USB power. Then the receiver will enter bind mode, indicated by rapid blue receiver LED flashing.
b.Now, on the radio, hold the bind-button while powering on the radio (or what it takes to enter bind-mode).
c.The blue receiver LED should stop blinking and turn solid on when the bind is completed.
d.Only need to bind the radio ONCE.Next time the receiver will bind to the last radio automatically.
If you have problems binding change the TX to DSM2/22ms mode. Normally what you set on the TX is the desired mode and the TX+RX negotiate their capabilities and select a mutually compatible mode. The receiver in this quad seems unable to do that reliably.
If you still have problems binding take the TX and walk to the other side of the room. This is a solution that Spektrum themselves recommend for some TX+RX firmware combinations. This seems to be the case between my DX8 and this quad.
If you get the version with external FrSky RX,click HERE for help.
Betaflight/Cleanflight GUI Set Up
The flight controller board comes pre-flashed with BetaFlight and proper settings for the Makerfire FPV Micro Drone already set up but you still need to configure the receiver settings. Also if you upgrade the firmware or reset settings, you will lose the receiver settings and need to set them up again.
CLI Tab:
Go to CLI and type this in.
set motor_pwm_rate=10000
save
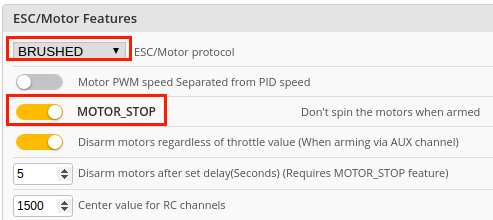
Configuration Tab:
ESC/Motor Features,ESC/Motor protocol,click and select BRUSHED,switch on MOTOR_STOP(optional).
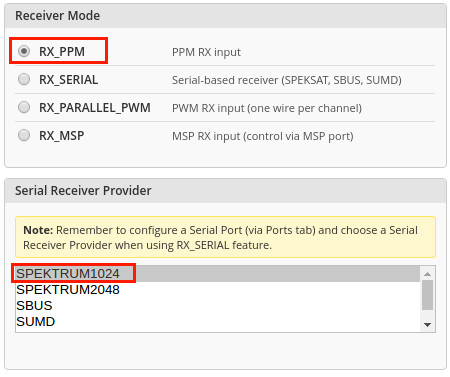
Receiver Mode, choose RX_PPM;Serial Receiver Provider, choose SPEKTRUM1024.And click the Save and Reboot button in the lower right corner.
The receiver is NOT serial.It outputs PPM signal.
The receiver does not follow the Spektrum channel mapping. Instead it outputs AERT1234.
Modes Tab(Optional):
ARM,click Add Range.ANGLE,click Add Range.And click the Save button in the lower right corner.

Frequently Asked Questions
Due to the overwhelming response from the customers, we have put together this FAQ to answer the most commonly asked questions.This section will grow as more and more customers give us valuable feeedback and suggestions on how to improve the tuning.
Q:Can I enjoy it if i am a drone hobby beginner?
This is not a beginners quad.You will need a decent transmitter.
You will need to know how to use the program cleanflight/betaflight.
Most importantly,you should have 5.8G goggles to enjoy the FPV experience.
Q:Is this a complete rtf quad and does it include a battery?
This is not complete RTF drone. You will need a transmitter to bind to it. Spektrum DX8 is recommended.
Q:I want more information about the brush flight controller.
Makerfire F3 brushed flight controller with Native DSM receiver, support DSM2 protocol with 8 channel or above for this current version, compatible with Spektrum DX8, DX9, DX10, DX18, DX20 transmitter, would be upgrade for supporting all Spektrum radio transmitter, like DX6/DX6i.
Q:What Flight Modes does it have?
The board runs the popular Cleanflight/Betaflight firmware that is fully customizable and includes several different modes: Auto-Level, Horizon (auto-leveling mode with ability to flip), and full manual (rate). You can also enable AirMode and be able to control the quad at any speed and attitude!
Binding & Betaflight Setup Procedure with External FrSky RX
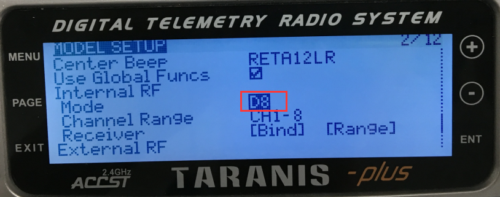
a.Turn on transmitter, create new mode and enter setup, the Mode must be D8.
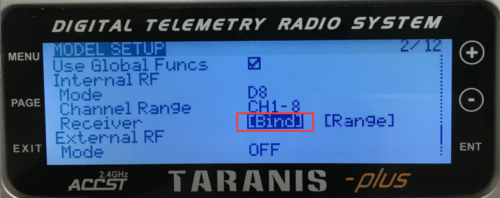
b. Power on the quadcopter by connecting the battery,red LED at the tail of the drone will flash rapidly on receiver after 6 seconds, the receiver is in ready for binding mode.Then turn on the transmitter, enter the binding mode, the red LED will turn solid, this means it has binded successfully with the default mode in SBUS.
Connecting the USB cable will not power on the FrSky RX,so you MUST connect the battery when binding.
Turn on the transmitter for 6 to 30 second to be binded in SBUS mode; Turn on the transmitter after 30 seconds to be binded in PPM mode. The flight controller will default SBUS mode.
c.For each flight, turn on the transmitter firstly, then power on the quadcopter, if the receiver has a solid red LED,this means it is binded correctly,with RSSI telemetry.
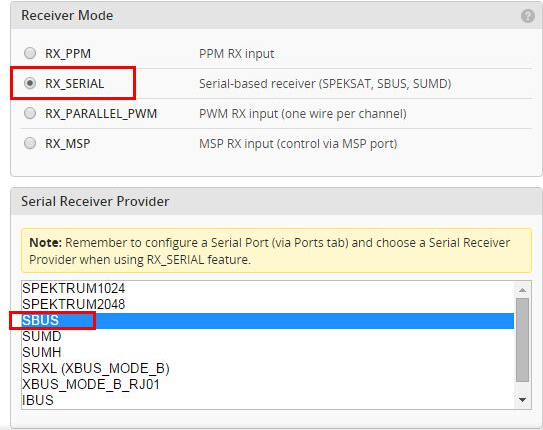
With FrSky RX,there are several different configurations to DSMX RX with Betaflight GUI .
The FrSky receiver is serial.It outputs SBUS signal.
Ports Tab:Switch on Serial RX of UART2.And click the Save and Reboot button in the lower right corner.

Configuration Tab:Receiver Mode, choose RX_SERIAL; Serial Receiver Provider, choose SBUS.And click the Save and Reboot button in the lower right corner.